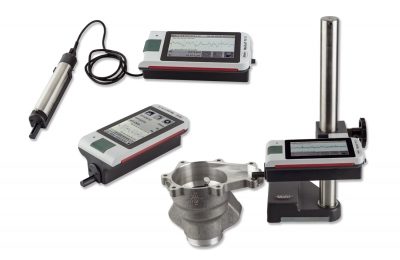
Mahr Offers Handheld Inspection Tool

Mahr introduced the MarSurf PS 10 during IMTS in Chicago. The PS 10 brings smartphone operation and laboratory performance to the shop floor. The measuring unit is intended for quick roughness testing in and on a machine while in production. It can be utilized for quality assurance of milled and turned parts, ground and honed workpieces, on large machines, large workpieces, or for use with incoming inspection.
The range of measuring applications is expanded by the ability to remove the drive unit from the MarSurf PS 10 and operate it separately from the display, providing the user with more flexibility. The drive also supports small diameter parts during the measurement cycle. Optional probes for different measuring tasks allow for the measurement of gears and deep measuring points such as in grooves or bores. The large battery pack recharges in 1.5 hours and enables over 1,200 measurements per charge.
Measuring data from the MarSurf PS 10 can be saved in TXT, X3P, CSV, or PDF formats as finished measuring records with no additional software. A Mahr calibration certificate is included in the scope of delivery, and error-free measurements are made possible by the integrated and removable calibration standard. When combined with Mahr eStick wireless data transmission, data collection becomes seamless with MarCom software.
"Weighing in at just a pound, the unit's display adjusts to allow users to measure in all positions – horizontally, vertically or upside down,” said George Schuetz, director, precision gages, at Mahr Federal. “In addition, the unit can be mounted on a measuring stand to provide a stationary roughness measuring instrument for small workshops."


