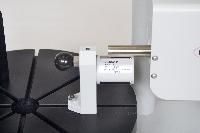
Surface Finish Gage Indexes, Measures Multiple Small Parts
Mahr Federal Inc. introduces a surface finish gage designed to index and measure numerous small parts, such as gears, fuel injector components and inner or outer bearing components. The gage can support as many as eight measuring stations incorporating a Perthometer M1 or M2 surface measuring instrument. Most common profile parameters are supported, including DIN, ISO, ASME and SEP.
“With most surface measuring systems, the concept is to fix the part and maneuver the measuring head around it,” says Ron Lavoie, director engineered solutions for Mahr. “What’s interesting about this solution is that we have fixed the measuring device and present the parts to it. This provides a very economical way to measure many different characteristics on a series of parts without having to replicate the measuring system.”
The original design was custom-made to accommodate a series of different types of gears that required measurements on the inside diameter and on the end face. “The fixture we designed uses a lazy susan type staging table to stage up to three varieties of different parts,” explains Charles Toffling, Mahr Federal product engineer. “The part tooling holds the parts either on their IDs at two different measurement depths or on their end faces so you can measure the front face. The tooling is designed at a known height so that the measurement altitude is always the same. In operation, you put the part on the gage, rotate the table to index over to the centerline of the gage head, then rotate the handle to position the probe for measuring.”
The gage is 18 inches long by 12 inches deep, with the drive unit and measurement head enclosed. A diamond stylus probe is protected by a metal shroud and only contacts the part if it is positioned correctly for measurement. “The probe is automatically lowered and raised when the measurement head is positioned on the part,” Toffling says.


