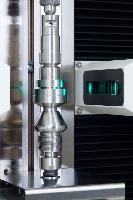
CA614 Enables High-Speed, In-Line Contour Inspection
The new opticline CA614 noncontact shaft measuring system is designed for fast, easy, economical and robust submicron measurement of all contour features on complex shaft-type parts up to 600 mm in length, 140 mm diameter. The stroke is driven by a motorized tailstock, freely positionable over the full holding range, permitting easy, fast, and precise workpiece loading and holding. The value of the Contour Automatic series has been proven in automotive and aerospace applications, including carrier shafts in aircraft engines, drive parts in helicopters, and various rotor parts. In these instances, the system inspects length, geometry (angles, radii, etc.), form (roundness, run-out) and diameter in rapid cycles. Ease operation and programming, plus the system's unique flexibility to measure any number of different part variations with little or no changeover, delivers maximum return on investment to manufacturers.
Depending on the measurements required, standard measuring functions can be quickly combined into one optimized measuring run. Examples of combined dynamic functions include: size roundness, run-out, minimum size, maximum size, etc. and can be computed based on a single contour record. The measurement system monitors itself for negative ambient influences, providing automatic active temperature compensation before every measuring run. Contour Automatic hardware and software are optimized for use in production environments to provide maximum reliability over long periods of time. The optical sensor operates in an environment that protects it from part wear and collision, while delivering short cycle times, accuracies into sub-microns, and computed measurement results within a few seconds. Once a new part is loaded into the system, a simple scan is performed that within seconds commits the part to memory. User-friendly software then allows the user to intuitively create new measuring programs within minutes based on the preliminary scan.
The creation of part measuring programs, data display, and further processing of the measurement results takes place through an easy to understand graphical user interface (GUI). The user interface also provides the capability to customize inspection reports for satisfying plant and customer demands. In operation, the part is loaded into position then automatically scanned opto-electronically utilizing the silhouette principle. The work-piece contour can be evaluated quickly and precisely utilizing the high resolution associated with each measured datum (statically or dynamically). A flexible, pneumatic driving fixture provides defined workpiece driving and easy workpiece handling.


