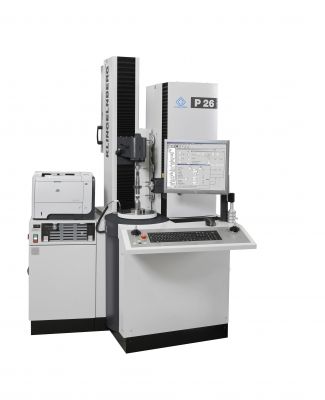
Klingelnberg P 16, P 26 and P 40 Measuring Machines to be Presented at Control 2016
Klingelnberg will be at Control 2016 (April 26-29), presenting a round of talks at its stand in Hall 1/1418, which will cover all aspects of gear measuring technology - from innovative technologies to first-class service.
Klingelnberg is presenting its range of gear measurement products in five major disciplines of gear measurement, production measurement, dimension, shape and position measurement and measurement analysis, as well as the range of multifaceted services at its stand in hall 1/1418. With three measuring machines on exhibit at a stand covering a total floor space of over 200 square meters and a number of different software presentations, visitors will get hands-on experience with Klingelnberg technologies. This year, the P 16, P 26 and P 40 measuring machines will be presented. The system supplier will provide demonstrations of how the precision measuring centers are consistently able to deliver reliable measuring results. Thanks to advanced software, they are also easy to operate.
"All precision measuring centers have been equipped with new versions of the calibration software, as well as a modern graphical user interface," reports Dr. Christof Gorgels, product line manager of the Gear Measuring Technology division at Klingelnberg. "The new Windows user interface, soon to be established on the market under the ‘EasyStart' brand, allows the machine operator to operate the machine in a manner that is both significantly easier and target-oriented. A clearly structured user interface, displayed by a tiled layout with appropriate symbols for the specific measuring application, ensures a quick and easy program start on the gear measuring machine. Most machine operators will already be familiar with this type of application from the current general Windows system interface."
An additional focal point of this year's fair presence is the measurement of compact and miniature gearings. Klingelnberg will be presenting a world premiere here: Roughness measurement, already firmly established at Klingelnberg for quite some time, has been further developed so that roughness measurements can now be performed fully automatically on gearings from module 0.9. Georg Mies, head of measuring machine development at Klingelnberg, explains: "Even the finest structures on barrel-finished gearings can be measured and evaluated with the utmost precision. Thus for the first time ever, roughness testing can now be performed on such gearings."
As in years past, Klingelnberg will be bringing in a measurement analysis expert to take part in exciting discussions: Dr.-Ing. Günther Gravel, Head of the Institute for Production Technology at the University for Applied Sciences (HAW) in Hamburg. He will be available at the Klingelnberg stand with his technical expertise, all day on two days of the exhibition.


