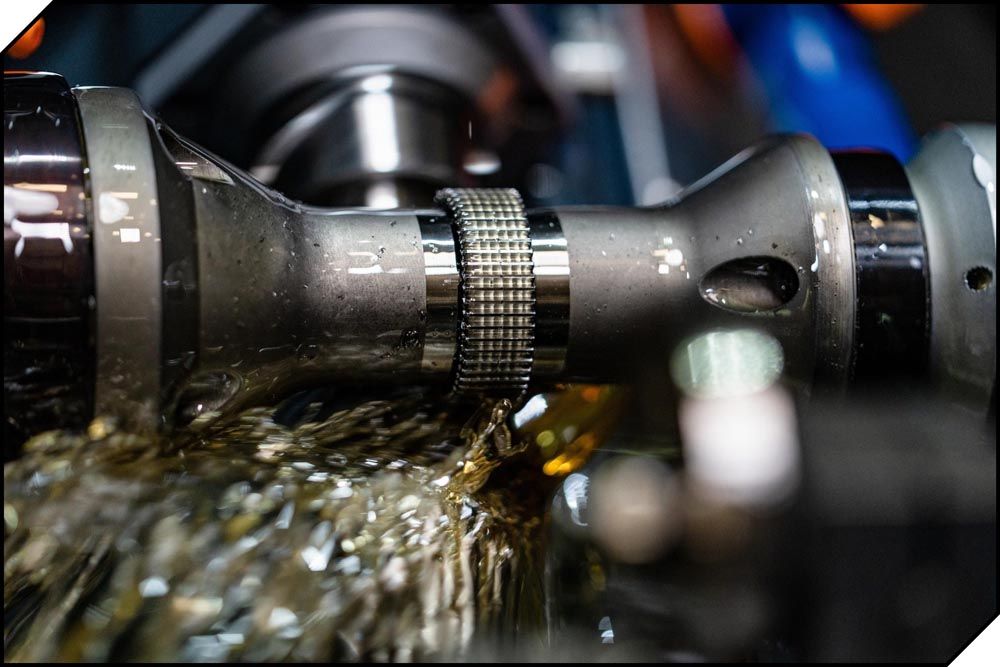
Batch grinding on a CPX with high material removal rates and to tight tolerances is a basic function of the machine, the OD measurement system takes it further by utilizing the Statistical Process Control (SPC) feature that comes standard with the OD measurement software. SPC is user defined, the tolerances along with the Cp and CpK values are constantly monitored, controlled, and reported to the user.
The OD measurement system is permanently mounted inside the machine and only called upon when required, based on the set tolerances and the frequency of measurement, an accurate in-process measurement and compensation is applied to maintain the blank OD to the nominal diameter.
The system is flexible with the ability to handle multiple diameters in one setup, making it perfect for complex blank geometries/shapes and longer batch runs.
GCX LINEAR
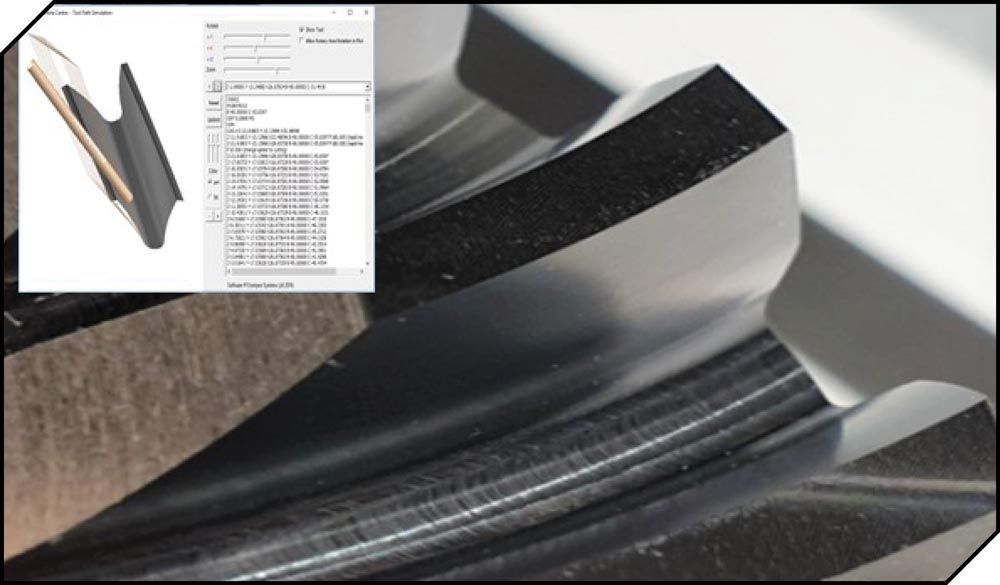
Driven by the automotive industry’s electrification and the general rise of e-mobility, the demand for skiving cutters has seen 30 percent year on year growth. The GCX Linear provides a complete solution for customers to tap into this rapidly developing market, including the ability to produce skiving cutters, shaper cutters and regrinding of hobs. It offers advanced stand-alone software to design and optimize the tool, neatly interfaced with the gear tool package inside ANCA’s ToolRoom software.
The machine is designed for accuracy with features including all axes with LinX linear motors and an enhanced headstock. GCX Linear boasts a series of technologies: AEMS dressing, MTC on grinding spindle and dresser spindle, integrated gear tool measurement and direct compensation—setting the new standard for producing skiving tools that achieve the highest DIN AA quality class.
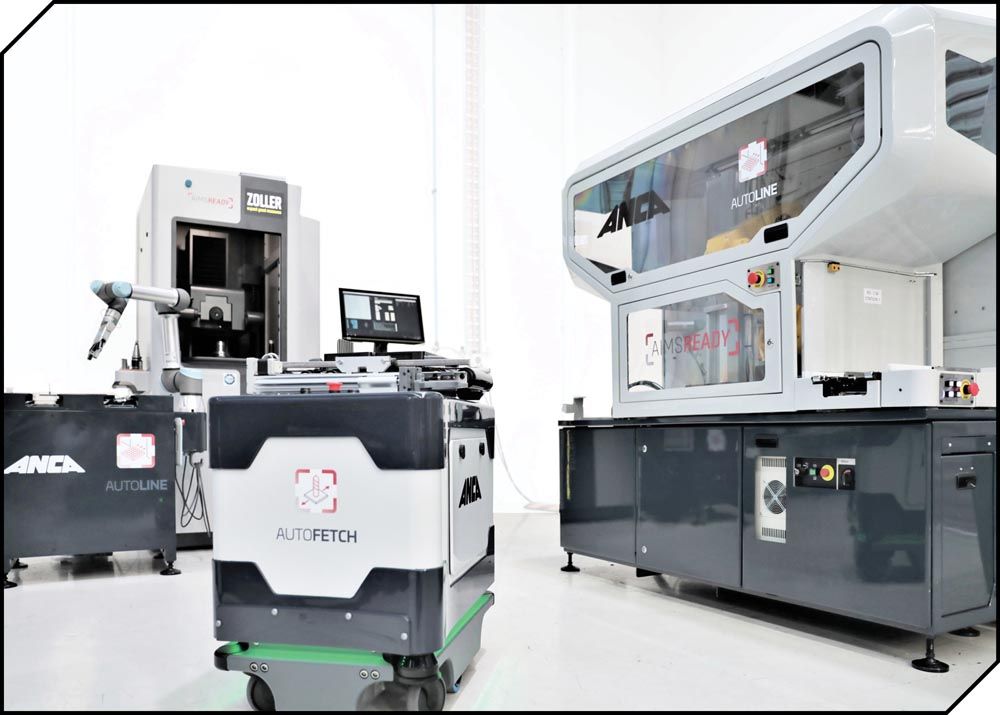
ANCA has developed a world-first integrated gear tool measurement system, which enables all the grinding-measuring-compensation to be done in the machine. This is the only practical closed-loop solution in the market and will be on display at IMTS as part of the skiving cutter production process on GCX Linear.
anca.com
Dontyne Gears/Dontyne Systems—#237227 (North Building)

Dontyne Gears is looking forward to IMTS to promote the company’s range of gear design services developed during COVID restrictions. Dontyne Gears continues to work with companies to complete design projects including CAD models and drawings if required. They recently purchased an Okuma Genos 5-axis to add to the Osaka Siemitsu high accuracy gear inspection center already in house for prototyping. As well as cylindrical gears it is possible to produce straight, spiral, and hypoid bevels. The work is facilitated by using Gear Production Suite (GPS) from Dontyne Systems to generate tool forms, G-code, and inspection protocols which can be used by the machines.
Dontyne has designed and constructed a test rig to bench test cylindrical gear system. This is specialized to the higher ratio ranges typically found in EV applications, but they’ve worked on custom models for some clients to test their own applications. The test rigs are now offered as a product line of Dontyne. Offering a more complete development service with at least a basic test validation from one source keeps costs and lead times down encouraging companies to enter a development program with lower risk levels.
It has been possible to complete R&D projects including production not available onsite by collaborating with companies with specialist knowledge in forging, grinding, and sintering. Dontyne has worked on the design of bevels with increased bending strength and reduced production times by making dies on 5-axis machines, grinding of non-involute gear forms, and improved performance characteristics using powder metal gears.
Dontyne has entered into a sales agreement with Renishaw Inc. to offer their own inspection solution using their Equator device called Dontyne Integrated Gear Gauging Solution (DIGGS). The hardware works with Dontyne software and support services to remove bottle necks caused by dependence on measurements in temperature-controlled environments. Measuring cycles have been reduced to less than 30 seconds in some cases while maintaining a realistic level of accuracy for production. A simulation added to the GPS software can establish inspection type, time, and check for interference of the probe at the design stage prior to production. This is only for cylindrical gears at this point, but a bevel gear option is in development. Dontyne will be demonstrating this during IMTS.

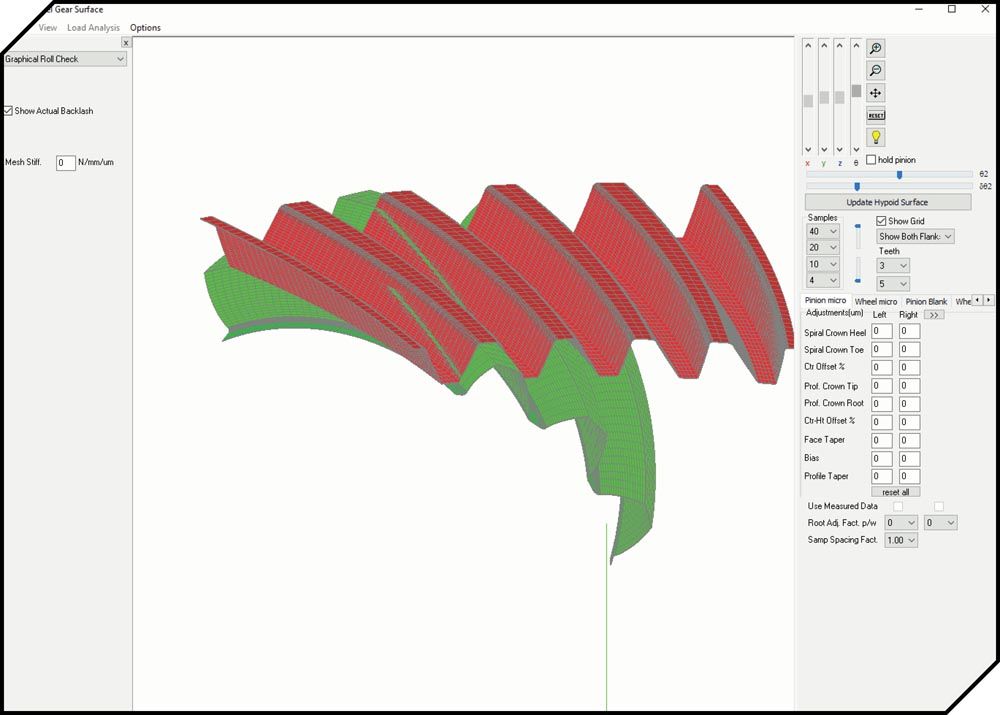
Dontyne Systems will promote the latest developments of GPS at IMTS. In recent years, the company has concentrated strongly on linking gear design to tool design and manufacture. An important part has been to produce complex gear forms at low cost on flexible multi-axis machines. As wells as cylindrical gears, it is possible to produce straight and spiral bevels using standard end mill tools. The software has been adopted by many companies in the UK and beyond for low volume production and for R&D. A hypoid design option has been added for the current GPS 5.7 release. Interfacing to the Equator and Sprint devices from Renishaw has enhanced the ability to create a closed loop control system at low cost compared to dedicated gear machines.
Dontyne has also improved the hob/grind simulation for GPS 5.7 already in wider spread use worldwide, to manufacture Beveloid gear forms compatible with grinding machines such as those produce by Reishauer AG. The hob/grind functionality in GPS has been integrated to the Romax Technology system model software to confirm correct gear generation and define stable and safe production tolerances at the design stage. An interface exists from system model software of both Romax and Ricardo to GPS this to enable user to quickly and accurately export data to tool makers using Dontyne’s software whether in house or outsourced. The manufacturer can quickly check and take corrective action if required. The correction can be updated in the client while still in the design stage. There are significant savings to be made in avoiding mistakes during production.
There has been significant improvement to the skiving and honing simulations. This has included validation of gear tooth profile calculated by skiving simulation in GPS with software used internally by Kashifuji, Japan. Good correlation was seen in various cutting conditions including expected profile changes due to tool sharpening. The GPS project files can be utilized by tool makers using the Dontyne Machine Centre module reducing production times and the risk of inaccurate data transfer. Dathan Gauge and Tool, UK has been able to produce skiving tools more quickly and accurately by adopting the software while also improving communication with their clients.
dontynesystems.com
dontynegears.com
Helios Gear Products—#236906 (North Building)

Helios Gear Products will debut two state-of-the-art gear manufacturing solutions at the International Manufacturing Technology Show in Chicago, September 12–17, 2022.
After a soft launch of the Hera series gear hobbing machines during the 2020 COVID-19 pandemic, the company is delighted to officially debut the leading Hera 90 and Hera 350 to the North American market at IMTS. The Hera CNC gear hobbing machines support micro- to coarse-pitch gear manufacturing applications with world-leading technical features such as complete Fanuc CNC and direct-drive torque motors, x-axis linear scales, easy-to-use (and train) dialog programming, and versatile unified automation systems. With globally competitive pricing, proven domestic support from the expert Helios team, and a unique combination of technical capabilities in a small footprint, the Hera machines offer both job shops and end-product gear manufacturers world-class hobbing solutions.
“Manufacturers have found the Helios Hera CNC hobbing machines to be extremely cost-effective, high-quality platforms for 21st century gear production,” said David Harroun, Vice-President of Helios Gear Products. With several transformative installations across the United States, the Helios team is excited to demonstrate the capabilities of the Hera gear hobbing machines to the North American public for the first time at IMTS. Jeff Kamps, Helios customer and president at Wisconsin Gear & Machine, says, “We've cut our cycle times down from four hours to a half hour. It's really been beneficial for Wisconsin Gear. With the shortage of people, it's really made a big difference; we can still get a large volume of work done in a timely manner.”
Heliosgearproducts.com
Index Corporation—#339119 (South Building)

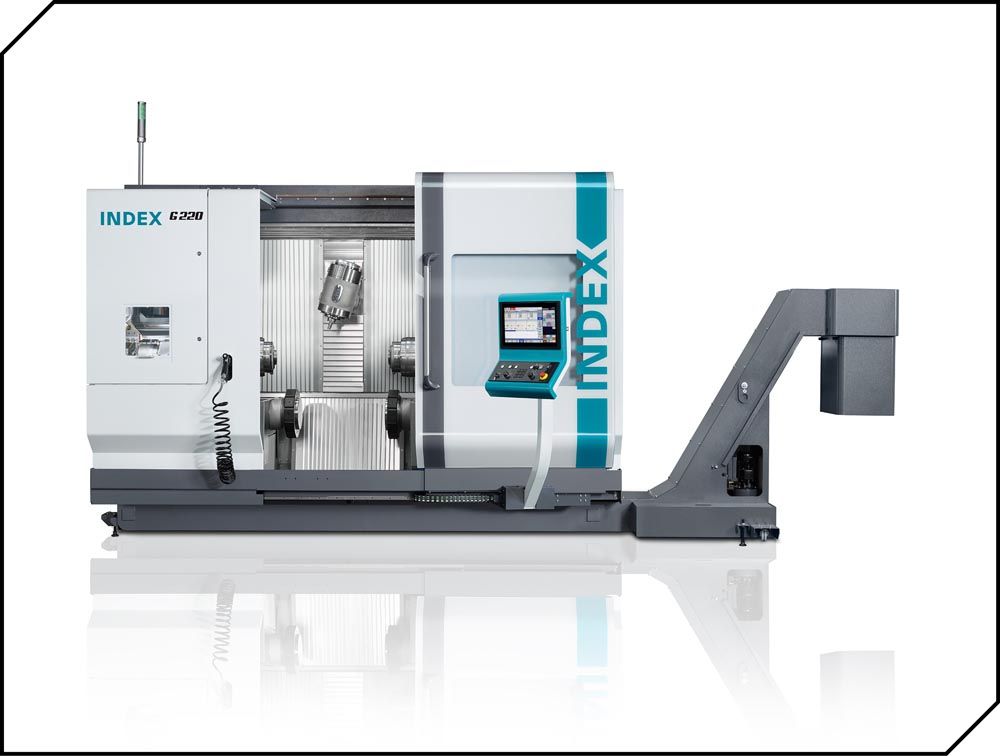
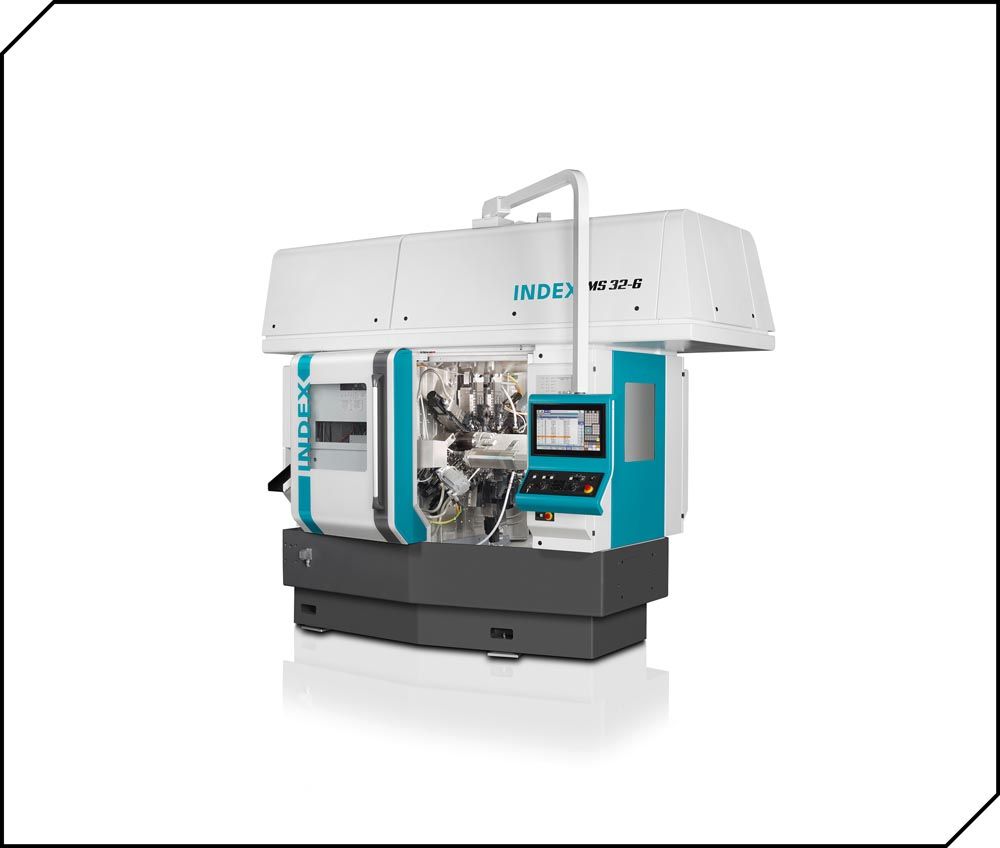
Index has announced that IMTS 2022 will host the North American debut of the company’s next generations of its G220 turn mill center, MS32-6 CNC multispindle and TNL12 sliding headstock lathe. The company will also be presenting information on the latest additions to its iX4.0 Industry 4.0 platform, as well as providing space for the demonstration of a metal 3D printer by its subsidiary One Click Metal. Index will be located in Booth 339119 in the South Building.
The new G220 incorporates and refines the design principles introduced via the larger G320, G420 and G520 machines. With twin spindles, dual tool turrets, a 5-axis milling spindle and high-capacity tool magazine, the machine can easily produce a wide variety of parts in a single setup.
The design concept of Index’s G Series machines begins with a rigid, vibration damping machine bed in a mineral cast block design. Each machine in the series combines optimal stability and damping properties with high dynamics and generously dimensioned linear guides in the x and z axes.
The G220’s milling spindle offers a hydrodynamically mounted y/b-axis arranged above the axis of rotation. Each of the machine’s turrets provides movement along the x, y and z axes and each of the turrets’ stations can be equipped with live tooling. Additionally, the G220’s large workspace and internal layout enables simultaneous machining with the milling spindle and both turrets. Combined, these features allow incredible flexibility to cut varied part features and geometries with extremely high efficiency.
The new MS32-6 CNC multispindle features a modular design that achieves flexibility and fast, user-friendly setups, bringing the benefits of multispindle production to a much broader range of applications.
Accommodating up to 32 mm bar stock, the MS32-6 easily handles a wide variety of complex parts, as the machine is equipped with two v-shaped cross slides at each spindle position. Each cross slide offers x and z axes as standard, and c and y axes, together with live tools, can also be implemented to allow for a broad range of machining processes, including off-center drilling, threading, contouring, hobbing and polygonal turning. Each of the machines’ slides can also be alternatively configured with a single NC axis for grooving or drilling.
Each cross slide in the MS32-6 now incorporates Index’s patented W-serration locating system that provides μm-accurate alignment of the tool holder. Coupled with the company’s newly developed quick clamping device, tools can be set up off of the machine and then quickly installed, reducing tool change times by 50 percent. Additionally, the machine incorporates the same W-serration system on its live units for drilling, milling and polygonal turning. By presetting tooling for these operations off of the machine, setup times can be reduced by up to 92 percent.
Furthermore, the MS32-6 allows users to apply twin turrets with rigid tools in up to five spindle positions. These hydraulically controlled units can alternate between tools in less than half a second. This enables the efficient use of separate tools for roughing and finishing in the same position. The twin turrets can also be used to reduce tool changes by incorporating duplicate tools, an option that is especially attractive when working with difficult-to-machine materials.

Comprehensively redesigned from its previous iteration, the new TNL12 sliding headstock lathe offers an exceptional value proposition to manufacturers of small parts, especially those serving the medical industry.
Like its predecessor, the new TNL12 features four tool carriers that can be applied to a workpiece simultaneously, albeit with significant changes to the machine’s kinematics.
Index will also be demonstrating the expanded capabilities of iX4.0, the company’s Industry 4.0/IoT platform. A wide variety of new apps have been added to the platform, giving manufacturers the tools needed to easily monitor, gather, and analyze data on machine performance. Each Index machine includes 12 months of access to iX4.0.
Lastly, Index’s booth will also feature a metal 3D printer from One Click Metal. A subsidiary of Index, One Click Metal is an additive manufacturing solutions provider dedicated to the vision of making the technology user friendly and accessible to all manufacturers.
www.index-usa.com
Kapp Niles—#237024 (North Building)
Kapp Niles will highlight a variety of machine tool technologies at IMTS 2022 for areas like mobility, automation, energy, and more.
KNG 12P Master
The machines in the master series are perfect for high-precision machining of external and internal gears as well as special profiles.
The machine concept stands for maximum workpiece quality. High thermal stability and rigidity are achieved through an optimized design and matching components. The inherently rigid machine base enables easy installation without anchoring in the hall floor. The dressing and grinding spindles are equipped with state-of-the-art direct drives.
The new functional and ergonomic machine design paired with an innovative user-friendly interface supports the user during set-up and optimization of grinding projects. High-performance technology options and application-specific alignment and measuring devices mean that maximum quality can be achieved even with batch size 1.

KNM 5X
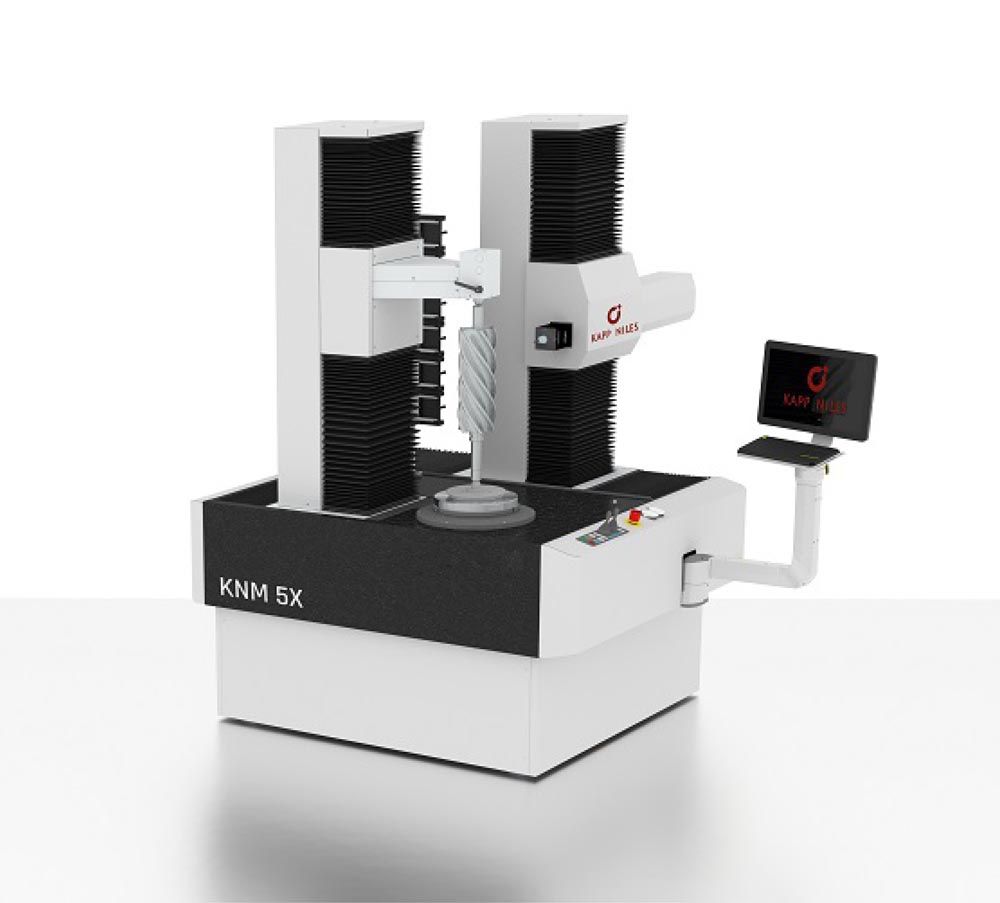
The KNM 5X analytical measuring machine is designed for high-precision measurements of gears, gear tools and rotationally symmetric workpieces up to a diameter of 650 mm.
All guides as well as the base plate made of granite are extremely stable in the long-term and have identically low expansion coefficients. With the temperature sensors in all axes and for the workpieces, temperature fluctuations are additionally compensated. As a result, the KNM 5X remains measurable even in thermally demanding environments. Air bearings with emergency operation properties ensure perfect and wear-free guides without short-term errors. Air spring elements underneath the base plates safely shield jolts and vibrations; separate bases are not required.
Non-ferrous linear and torque motors of the rotary tables ensure ultimate position precisions and path accuracy. Despite the compact design, spacious travel ranges ensure a tangential generating motion towards the base circle for any profile. Based on the requirements, different scanning touch probe systems can be used. The control cabinet can be arranged freely.
Digital Solutions
With tool data management, outside the machine exchangeable, intelligent components with all geometric and process-relevant data can be handled and clearly displayed. All tool data are stored centrally in one place and retrieved from there.
Individual storage systems can be fully displayed within a freely configurable storage structure. Components that do not originate from Kapp Niles can also be handled in the storage system. The warehouse management system can reduce set-up times when assembling the components, which represents a further building block in the overall process chain regarding optimizing the grinding process through digitalization.
The KN extender (computer set-up for workshops that equips workbenches with digital functionalities) maps the customers’ operation, labelling and management of all components outside the machine. In addition to the identification of components by RFID, optical recognition of the components is also possible. The system is designed so that components without RFID or QR code/DMC can also be managed.
kapp-niles.com
Klingelnberg—#236935 (North Building)
R 300—The Gear Noise Finder
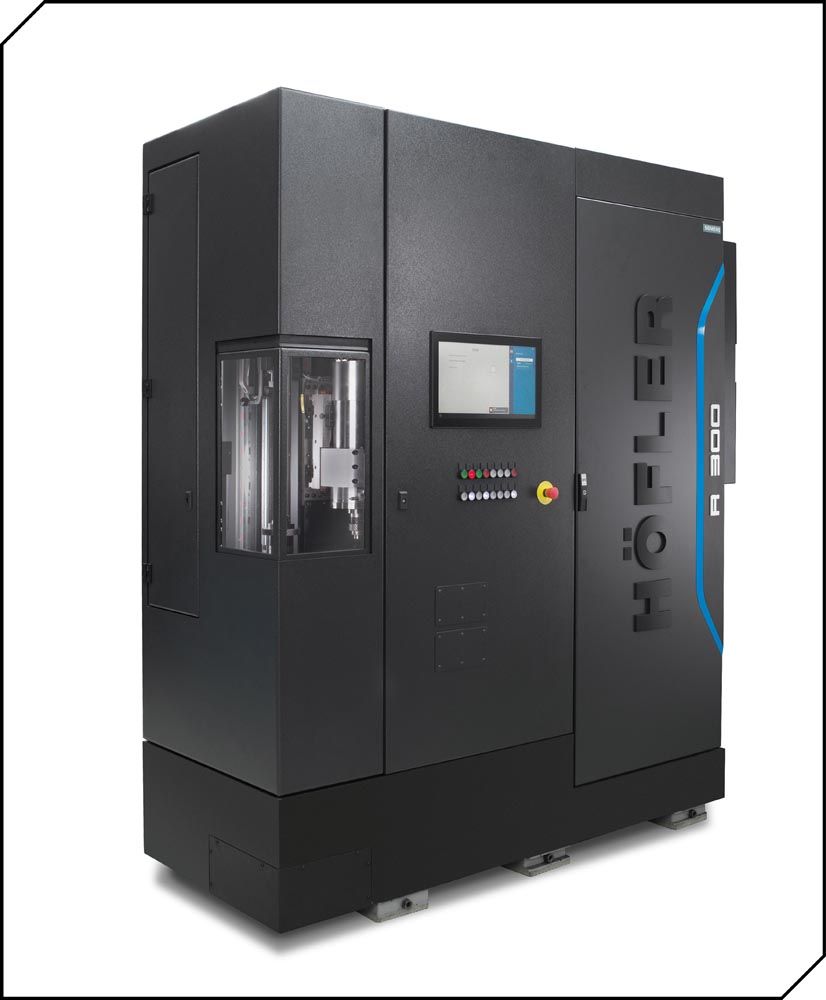
The Höfler Cylindrical Gear Roll Testing Machine R 300 is the latest machine development in the area of cylindrical gear technology. Due to the increasing quality requirements in large-scale transmission manufacturing, some transmission and vehicle manufacturers now require a certificate of quality for all gears installed in the powertrain. A further driver of ever-higher inspection levels is e-mobility, which places much higher demands on the noise behavior of a transmission due to the elimination of the combustion engine. To meet this challenge, Klingelnberg is building on roll testing technology, a familiar method from the bevel gear industry that is now moving into the world of cylindrical gears. Designed for all five roll testing methods, this compact machine is the ideal solution for anyone who wants to combine inspection cycles and reduce disassembly costs while benefiting from a user-friendly design. The many quality control requirements for gears can only be met with a flexible test machine.

Depending on the configuration, the R 300 provides the option of using all five roll testing methods. These include the single flank test, structure-borne noise and angular acceleration test, double-flank and helix roll test. Thus, the R 300 can be used at every point in the production process chain for cylindrical gears—from monitoring the soft cutting to checking the hardening distortions, to evaluating the noise behavior of the installation-ready gear.
In terms of axis traversing paths, the R 300 covers the same component spectrum as the tried-and-tested Höfler Generating Gear Grinding Machine Speed Viper. Wheel components can be tested up to an outside diameter of 300 mm. In conjunction with the optional counter support, shafts up to 800 mm long in extreme cases can be analyzed to determine their running performance and noise behavior. Yet the machine’s footprint is a compact 2 m2—saving costs on expensive production floorspace.
Reducing Measurement Times in Serial Measurement with a Hybrid Solution
Klingelnberg Hybrid Metrology is a smart combination of tactile and optical measuring technology. An optical sensor system developed specifically for gear measurement, as well as the rapid changeover between the 3D NANOSCAN tactile sensing system and the HISPEED OPTOSCAN optical sensor, enable flexible, fast, and highly precise measured value acquisition under all conditions.
With the current version of this option, pitch, tooth thickness, and gear concentricity can be measured optically on cylindrical gears, making it possible to increase the number of measurements for shop floor quality control per shift and machine by 20 percent on average. The appeal of this option grows with the number of teeth on the gear to be inspected. Approximately two minutes of quality control time can be saved per gear when it comes to gears of interest to the automotive industry. For gears used in electromobility, which frequently have a large number of teeth, this measuring time savings is even greater. And optical pitch measurement, like tactile pitch measurement, is performed in accordance with VDI/VDE 2613 Group I.
The measurement and analysis are performed using Klingelnberg’s well-known cylindrical gear software. With the latest version of the software, hybrid use of tactile and optical precision measuring centers as part of a networked system is made easy. Because the optical measuring system used by Klingelnberg is highly accurate on nearly every metallic surface, approximately 90 percent of cylindrical gears in a typical portfolio are suitable for optical measurement. All Klingelnberg precision measuring centers in the P 26 to P 100 series can be optionally equipped or retrofitted with an optical solution.
klingelnberg.com
Liebherr Gear Technology—#236914 (North Building)
LGG 180/280 generating and profile grinding machine
The Liebherr LGG 180/280 stands out with its compact design, impressive accessibility, and ease of setup. Different grinding heads can be used on the machine for every specific application. Also, an internal grinding arm can be adapted very quickly and easily—and even retrofitted. This means that both external and internal gears can be machined very economically and efficiently on this machine.
The GH240CB grinding head can accommodate large grinding worms with a width of up to 200 mm, considerably increasing productivity and economic efficiency. In addition, large multiple sector grinding worms can be used, which are ideal for generating grinding, finishing grinding and polishing grinding. Collision-critical gears can be ground with very small grinding worms, thanks to the extremely rigid spindle bearing and the counter bearing. The integrated centrifugal unit removes chips and coolant from the ground workpiece, eliminating any undesired oil loss in the machine.
Digitalization solutions: Customized digitalization solutions for your requirements
With a combination of data profiles, protocols and the LHWebPlatform, Liebherr provides an infrastructure for the acquisition, transmission, storage, processing, provision, and display of machine, operating and production data. In the basic app LHMachineInfo, users can see the live status of their machine tools briefly and observe changes in real time. The LHSignalInfo app visualizes the recorded signals, considering all measuring points and their exact time stamp. Liebherr has expanded the range of functions of LHWebPlatform to include a further tool: The LHReportInfo app visualizes and analyzes the performance of the machine and generates reports and evaluations from the machine data—a decisive step toward more productivity.
WGT 280 and WGT 400 gear inspection devices
The four-axis measuring instruments of the WGT series have high-precision mechanics and electronics, which are controlled by smart and user-friendly software. They meet all accuracy requirements regarding gear measurement and comply with VDI guideline VDI/VDE 2613, group 1. In addition to the gear inspection machine options available as standard, customer-specific solutions are also available, such as adjusting the travel range on the z-axis, longer tailstocks to accommodate long shafts, and rotary tables adapted to the payload. An automatic sensor changing system ensures uninterrupted measurement of the workpieces and offers the highest levels of convenience for the user. The extensive software features make the machines suitable for measuring all types of gears, such as spur gears, bevel gears, worms, worm gears, shafts, gear cutting tools, and other rotation-ally symmetrical parts.
Training for gear hobbing and generating grinding
Are you looking for high-quality, individual training courses and workshops on the topics of gear hobbing and generating grinding? Would you like to specifically improve or refresh your gearing knowledge in an effective way? Liebherr Academy offers a new and modern Machine Training Center (MTC) including a gear hobbing and generating gear grinding machine for practice purposes. Sign up here: go.liebherr.com/axd8mh
Pallet handling systems as a productivity booster
Liebherr pallet handling systems open the door to increased productivity, even for small batches.
Pallet handling systems handle workpieces on uniform transport pallets. This makes them the ideal automation system for one-off and small batch manufacturing, facilitating unmanned shifts through to “lights-out manufacturing” and enabling unit costs to be reduced by up to 40 percent and machine running times increased to up to 90 percent. The application and combination possibilities are diverse
The rotary loading system provides compact automation for one or two machining centers. The modular PHS Allround can be expanded in one-meter increments and links up to four machines. This means that the front ends of the system can also be used, and attractive options such as front access for machine access without downtimes, or the double loader for even more productivity, are available. The PHS Pro has no upper limit and can automate any number of machines, also with integrated material management.
Bin picking solutions with LHRobotics.Vision: From the technology package to the turnkey robot cell
Liebherr supplies automation systems for automated raw parts input and finished parts removal in production facilities and possesses extensive system and software competence for position and object recognition with 2D and 3D camera systems.
With the LHRobotics.Vision technology package, Liebherr is making this industrial application expertise available to a broad range of users of robot integrations, to withdraw unsorted components from deep bins with process reliability. As a manufacturer of bin picking robot cells, Liebherr knows the challenges of the application and, with the aid of artificial intelligence has simplified the software so much that it can be intuitively used by anyone.
The technology packages consist of a 3D image recognition system and the LHRobotics.Vision software for object identification and selection, collision-free withdrawal of parts, and robot path planning up to the depositing point.
A special feature is the optional simulation tool LHRobotics.Vision Sim. This enables the user to test and optimize the processes in a completely virtual manner, without expensive hardware investment.
liebherr.com
Mahr—#135810 (East Building)

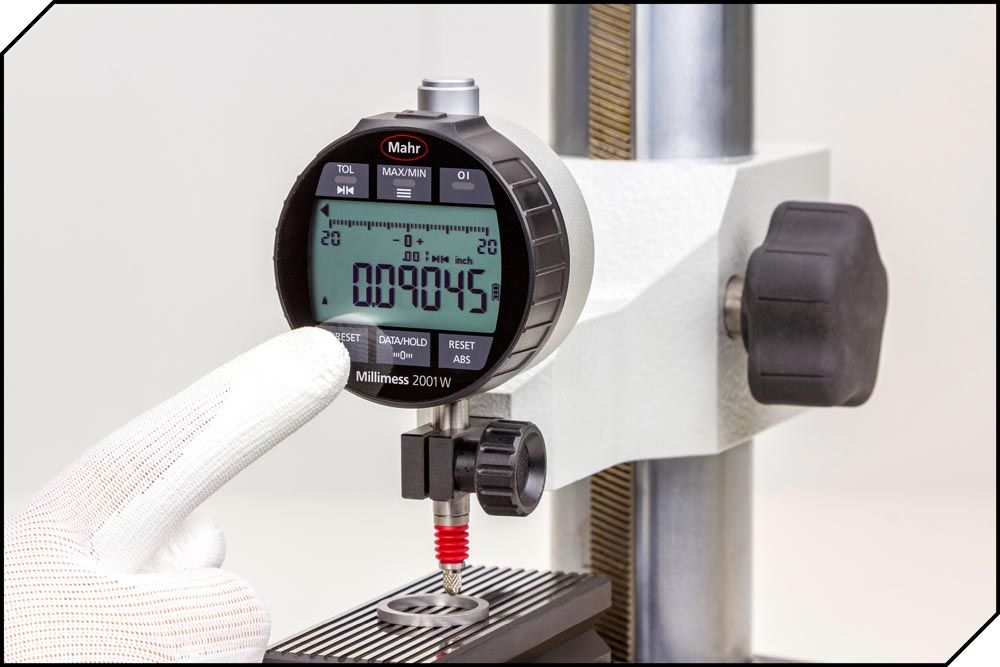
Mahr Inc., recently introduced a new generation of electronic digital comparators, the Millimess 2000 W(i) and 2001 W(i). The new digital comparators combine practical and reliable operation with maximum precision. Using a unique inductive measuring system, measurements are more precise than ever with added probe linearization—whether it’s a static or dynamic measurement task.
The principle of inductive length measuring probes allow for extreme sensitivity of the measuring system thus providing resolution of 0.1 um/5u". Colored LED signals visually indicate an additional clear measured value classification (good, reject, rework or warning limit) according to stored tolerance and warning limit values.
Durable and reliable
With practical touch control panels, the new digital comparators offer maximum measuring reliability even in harsh workshop environments. A light tap on the touchscreen is sufficient to safely operate the digital comparators with most commercially available gloves. This eliminates the possibility of measurement errors by accidental adjustment or deformation of the comparator. The full-surface glass display also offers protection against liquids and dirt, which cannot penetrate the sealed housing.
Convenient handling
The new bidirectional data connection system allows measurement data to be transmitted via integrated wireless or a data cable. In addition, Mahr digital indicators can be programmed and controlled remotely with the free MarCom Professional software. This offers a unique, convenient, and fast input of measurement parameters. With the integrated rechargeable battery, the digital comparators can be used completely autonomously for up to one month.
mahr.com
Marposs—#135621 (East Building)

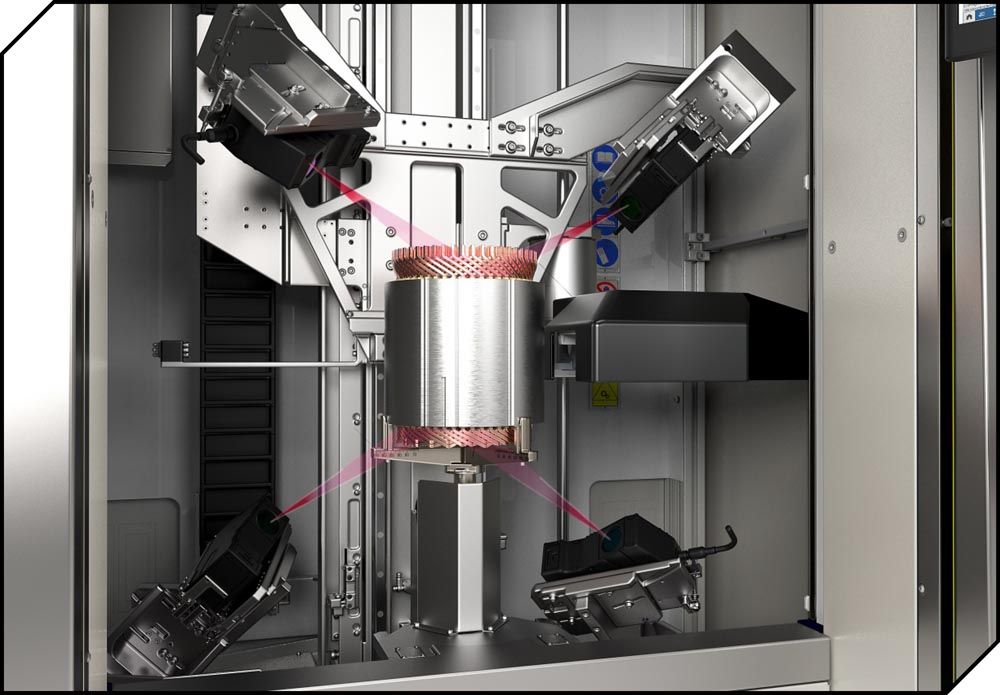
Marposs will be demonstrating OptoCloud EDU (Electric Drive Unit), its latest generation of 3D precision inspection solutions designed for the electrical vehicle industry. Using multiple laser heads in tandem with contact sensors for measurement and vision inspection, OptoCloud EDU reconstructs the 3D model of complex and articulated workpieces in less than a minute to ensure accuracy of the produced component. For example, it can validate 240 electrical contacts of a motor stator in only 30 seconds, which is 100 times faster than a traditional contact system.
The laser heads are integrated over a moving axis designed to position the lasers for the 3D acquisition.
To generate a point cloud of the workpiece, the part is quickly rotated 360° while the different laser heads each acquire spatial data that is then combined into a single 3D reconstruction and graphical representation made possible through the software. The system then executes the requested measurement and vision inspection tasks. Line operators can easily review images and navigate to the desired level of detail to identify any anomalies.
In addition to quality control capability, the multiple laser heads create a point cloud with such a high level of spatial resolution that the details provide a reliable dataset that can also be used for design reviews and final project validation.
Part handling is fast and easy with the OptoCloud EDU. Its design features a z-axis that allows the laser heads to automatically move out of the handling area, leaving a large space for workpiece handling and removing risk of sensor damage due to handling error. Marposs OptoCloud EDU can handle components up to 300 mm x 300 mm (12" x 12") and weights of 60 kg (132 lbs.). The system measures 1,200 mm x 1,304 mm x 2,304 mm (47" wide x 51" deep x 91" tall).
marposs.com
Nidec Machine Tool—#237036 (North Building)

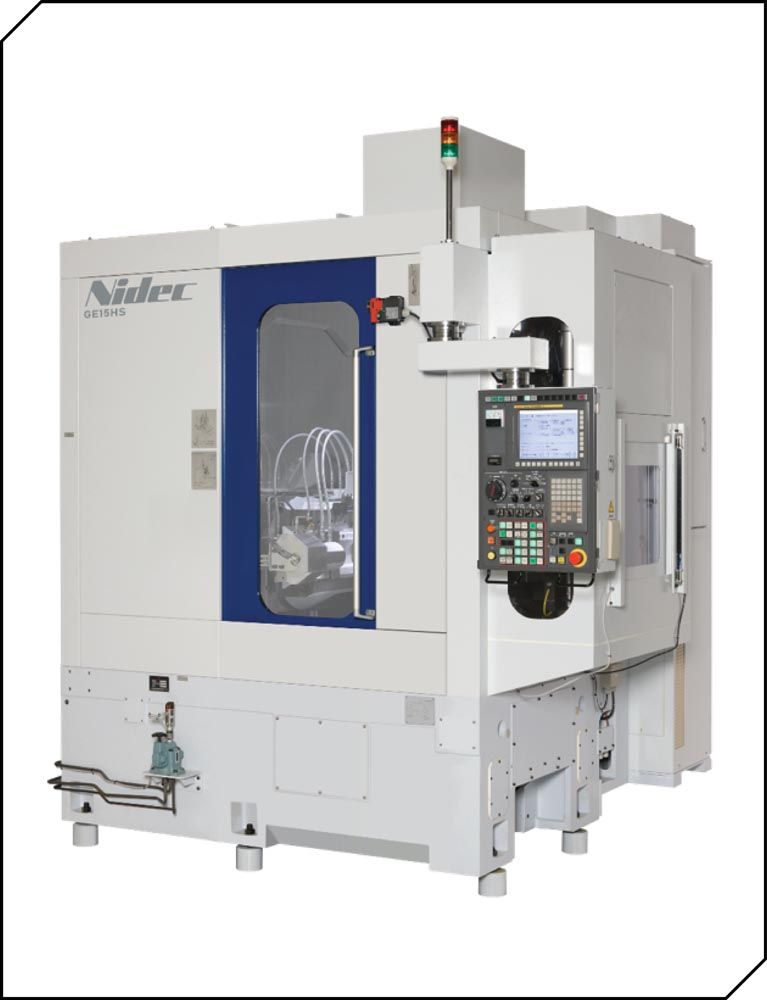
Supply chain issues are driving more companies to bring manufacturing back in-house. Parallel to this trend in automotive manufacturing is the rise of electric vehicles and increasing automation. Nidec Machine Tool (Wixom, Mich.), responding to the needs of the industry, is debuting the new The GE15HS gear hobbing machine from Nidec. Emphasizing high speed, precision and efficiency, the new machine produces gears for electric and hybrid cars, as well as for robotic and automation applications.
The GE15HS model is designed for gears with a maximum diameter of 150 mm, widely used in automobiles and motorcycles. The high-speed, high-torque direct-drive motor for the main cutting spindle provides a maximum spindle speed of 6,000 min-1—three times faster than previous models. The high efficiency spindle holding the workpiece uses a special table that provides high rigidity and high-speed rotation to handle the necessary thrust load for high efficiency machining. Cutting gears with Nidec super-hard cutting tools yields a surface roughness of less than Ra=0.4; on par with gear grinding.
Scott Knoy, Nidec Machine Tool America vice president of sales says, “The GE15HS provides process efficiency, eliminating the finishing process of shaving prior to heat treatment, thereby improving productivity, and reducing processing cost.” A larger machine, the GE25HS, is also available.

Used in combination with Nidec Machine Tool’s new materials and coatings for cutting tools, the GE15HS model provides stable mass production with a maximum cutting speed of 1,500 m/min.
More than 2,800 Nidec GE Series hobbing machines have been delivered and installed since the product launch in 2004.
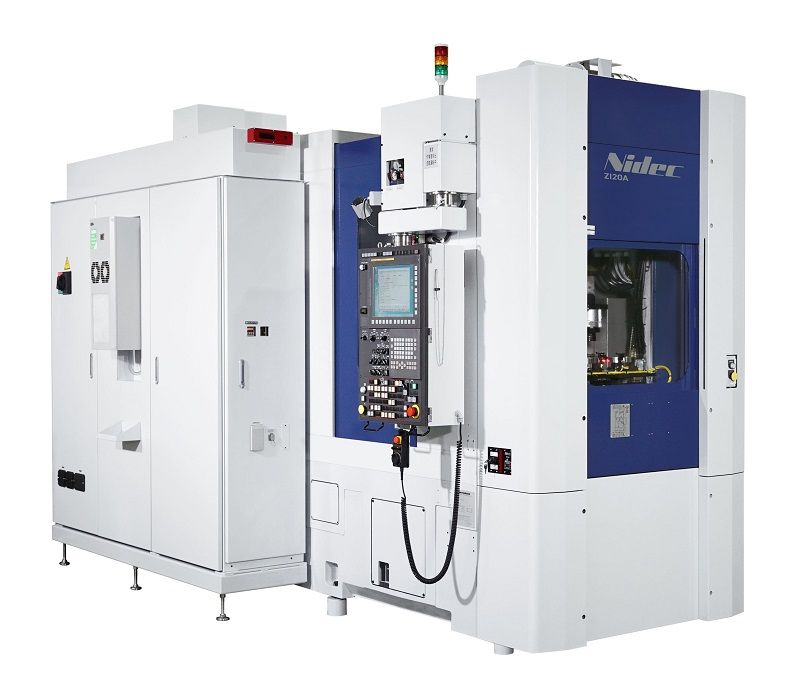
The Nidec booth will also feature the ZI20A-G Generating Internal Gear Grinder. Hard finishing of internal ring gears in mass production is the final frontier for automotive and truck transmission applications. For quiet, smoothly meshing internal ring gears, the ZI20A-G utilizes patented technology for threaded wheel grinding. This breakthrough process delivers fast and very cost-effective production of internal ring gears for planetary gear sets.
nidec-machinetoolamerica.com
Star Cutter Company—#237013 (North Building)
Star Cutter Company will be displaying its newest generation automated NXT 5-axis tool grinder in Booth #237013 at IMTS 2022 featuring detailed graphics that enable visitors to take a self-guided tour of the machine, which will be shadow grinding during the show. The display system will feature the 28 kW spindle option and four-station wheel change capability. It will be equipped with a robot loader and flat blade/insert clamping fixture for live demonstration of automated production. Videos to showcase tooling for form cutters, boring bars and medical hip rasps will also be on display.
The NXT is versatile tool grinder that offers a small footprint with a large grind zone, providing the ability to run both small and large diameter wheels. Featuring a modular design, it can be easily configured to meet specific customer grinding and resharpening applications while maintaining a competitive price point.
The NXT wheel pack and coolant manifold is configurable per application with up to five stations, offering the flexibility to handle everything from high mix/low volume production through low mix/high volume applications. It also has two spindle options—a 28 kW, 20,000 rpm Auto HSK for general manufacturing or a 15 kW, 24,000 rpm Auto HSK for manufacturing, regrinding, and high rpm applications. In addition to the automation solution, other options for process enhancement include a clearance-optimized flip-up, air-actuated tailstock and other various workholding solutions.
With the NXT, preventative maintenance is improved through real-time tracking of temperatures, spindle hours and bearing travel distances. Key to the system’s functionality is the control software, featuring the latest Flexium Tools with NUMROTO 4.3.0, as well as an ESPRIT CAD/CAM for freeform grinding with 3D simulation and special capability for medical components.
The NXT 5-axis Tool Grinder has a 6.5' W by 7.5' L footprint with a 30.2" x 19.9" x 25.6" (LWH) grinding zone and ability to run tools up to 10" (250 mm) in diameter. It offers FANUC robotic automation with 0.196"–1.250" (5–32 mm) gripper assembly.
starcutter.com
United Grinding—#236802 (North Building)

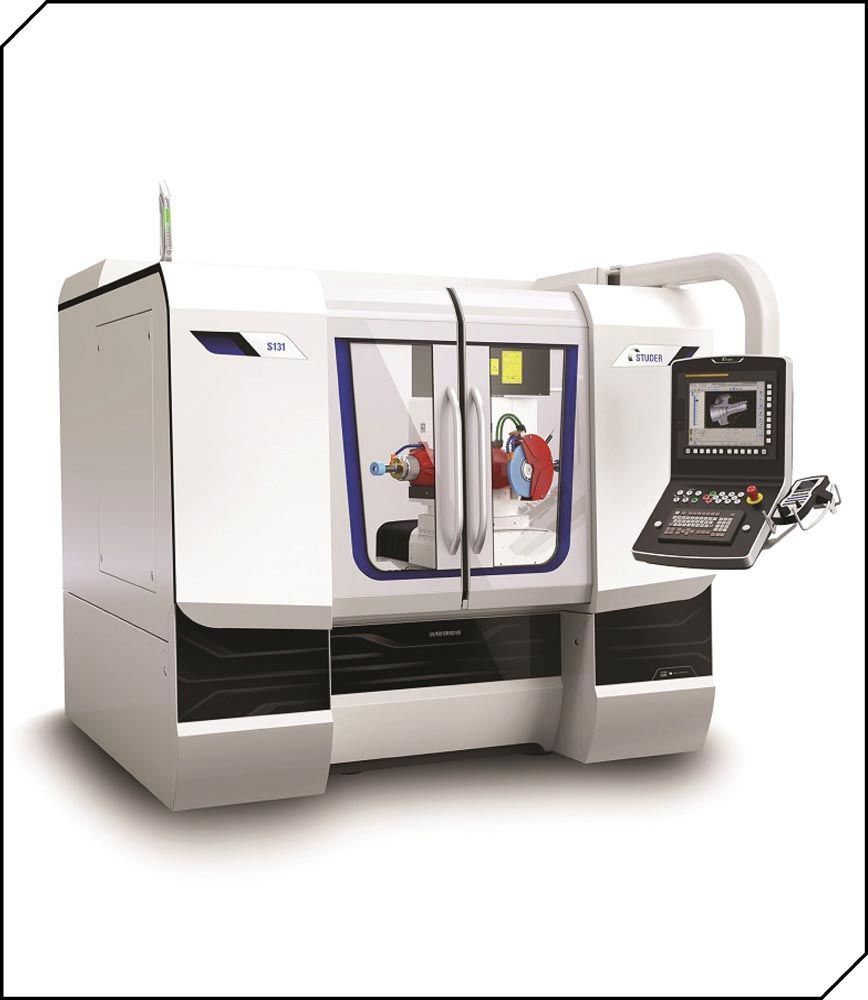
At IMTS 2022, United Grinding North America will be featuring the STUDER S131r cylindrical ID-radius grinding machine for I.D. grinding operations where maximum precision is paramount.
The STUDER S131r excels in general grinding applications and the production of complex workpieces made from extremely hard materials, along with hydraulic components such as axial pump pistons, guide plates and housings from hardened steel, cast iron and copper. The machine also handles single-clamping production of complex workpieces with tapers between 20˚ and 90˚.
The machine's fully automatic, completely sealed, simultaneously swiveling direct-drive b-axis offers superior thermal stability, mechanical rigidity and interpolation from -60˚ to +91˚, while the workhead c-axis enables form and thread grinding. High-precision axis drives with linear motors add speed and accuracy, and a -50˚ to +280˚ swiveling spindle turret with up to four grinding spindles enhances grinding flexibility. Temperature-stabilized components maintain precision while a Granitan S103 mineral casting machine bed provides thorough vibration damping.
With a swing diameter of 300 mm (11.81") above the table, 350 mm (13.78") x-axis/cross slide travel and 400 mm (15.75") z-axis/longitudinal slide travel, the S131r can machine external diameters up to 160 mm (6.3") with an external grinding wheel 250 mm (9.84") in diameter. The S131r accommodates parts up to 300 mm (11.81") long and up to 100 kg (220 lbs.), including clamping devices.
StuderSIM software enables operators to machine complex parts, often in a single clamping. StuderSIM derives workpiece geometry from a drawing, completely defining and generating all the data required for grinding cycles. Furthermore, operators can simulate grinding to easily check and visualize the processes on a PC or on the machine itself.
The S131r also features high-precision axis drives with linear motors, a Granitan machine bed for high levels of damping, thermal stability, and guidance accuracy, and the StuderGuide guideway and linear drive system for high wear resistance and long working life.
grinding.com
