The new series of GMS® Gear Metrology Systems truly makes a difference, meeting next level gear noise detection demands.
Latest Applications Demand Extreme Gear Qualities
Electric vehicles (EV) are moving from novelty to commonplace, while e-drive designs are continuously improving, posing their own set of challenges. Electric vehicle design starts with the all-important battery cell and is complemented by the electric drive itself and its respective transmission stage. In the years before electric vehicles were broadly introduced, gearboxes in conventional drive trains had already seen considerable change. Going from the historical 4-speed transmission all the way to a 9-speed was fueled by performance (keeping the combustion engine in an rpm range with ideal torque) and demands for highest efficiency with minimum fuel consumption requirements. Transmissions with up to 24 gears answered to the combined challenge of performance and economy.
With electric vehicles, the gearbox design has changed dramatically. Performance is put in the cradle of the electric motor, providing maximum torque at minimum rpm. The same holds true for economic considerations. Although gearbox designs have gone through considerable simplification when compared to a state-of-the-art 9-speed transmission, they are not necessarily simple to manufacture, with new challenges arising. The masking noise of the combustion engine has disappeared, replaced by an electric motor with zero noise emission. This has turned manufacturers’ attention to other vehicle components emitting undesirable noises, which may degrade the user experience of passengers. Amongst other components, the gearbox and its gears are challenged to become ultra-quiet, which requires not only improved manufacturing processes but also state-of-the-art quality inspection equipment.
The Successful 300GMS Newly Defined
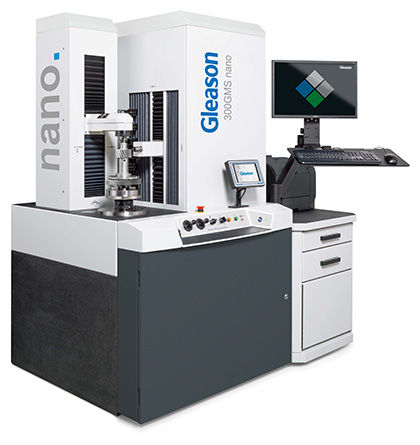
Introduced to the industry in 2012, the 300GMS quickly became a well-known, highly reliable, and accurate gear metrology system for customers around the world. The 300GMS not only boasts simple-to-use GAMATM (Gleason Automated Measurement and Analysis) software, but its compact footprint of approx. 1m² or 9sqf finds space in the smallest inspection room. Although small, its powerful measurement and analysis software package provides the whole bandwidth of gear evaluation up to 300 mm (11.81”) in diameter. The workpiece range includes cylindrical and bevel gears, shafts, worm gears, cutting tools, as well as non-involute gear forms like epicyclical and Novikov gears.
With the evolution of electric vehicles comes a rising demand for high-precision gears, such as gear noise detection and surface roughness measurement on tooth flanks under 1 micron, for example, on polish-ground gears. To meet this demand, 300GMS core components have not just been improved, they have been redesigned to achieve the next level of accuracy, resulting in the 300GMS nano with measurement accuracies down to the nanometer range!
Measurement Repeatability Improved Over 250% in Tooth Form Deviation
And the investment in greater accuracy indeed pays off. The 300GMS nano offers 250% improvement in form error measurement for both profile and lead repeatability, meeting the demands of the most ambitious EV manufacturers. While the 300GMS has exceeded VDE/VDE standards for a class 1 gear metrology system, the 300GMS nano engages even tighter tolerances. The 300GMS nano provides highest accuracy gear measurement and powerful analysis capabilities to evaluate gears for their noise characteristics, building a base for potentially required noise optimization. Yet its flexible and simple operation makes the 300GMS nano the perfect inspection tool for beginners in gear metrology and seasoned gear technology experts alike.
Next Level Gear Noise Detection
Gear noise contributors like transmission errors caused by geometrical deviations have long been known to be noise contributors in gear mesh. Gear specialists understand the influences of undesired gear and tooth deviations on noise and have found ways to improve them over the years. Tooth flank deviations, which lead to so-called “ghost noise”, are still hard to detect, and therefore, in many cases, have to be accepted by gearbox manufacturers. Now, with the surge of electric vehicles, ghost noise has caught new attention, and ways are sought to overcome it. Since tooth flank waviness is the main contributor to undesired high-frequency noise behavior in gear mesh, Gleason offers two pioneering software solutions for waviness detection.
GAMA Advanced Waviness Analysis
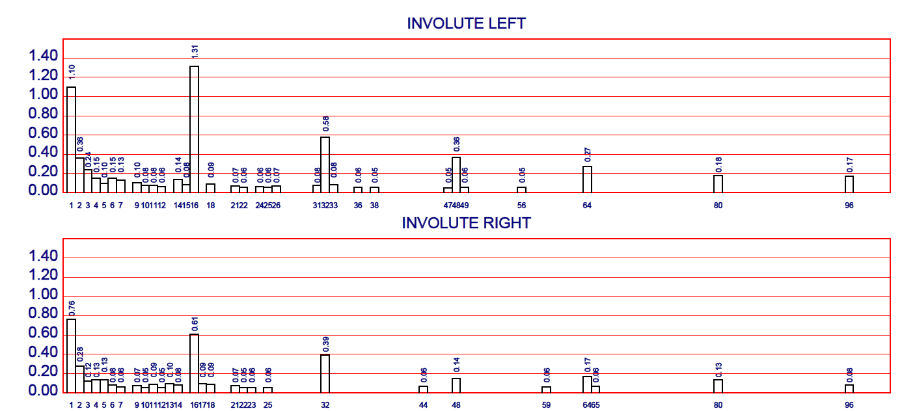
Advanced Waviness Analysis provides a fast way to analyze tooth flanks for waviness. The software uses single-trace inspection data of all tooth flanks of a gear, on both profile and lead. By combining tooth profile traces of all teeth and analyzing the gear for an entire rotation, it gives users a good understanding of the contribution of measured data to gear noise. The software uses enhanced mathematical techniques to analyze all wave lengths and amplitudes and present them in simplified graphics. The detected amplitudes are shown in an easy-to-read bar chart, giving numerical value of the amplitudes. Additional functions, like removal of pitch and runout influences in the Waviness Analysis, make it even easier to detect the source of gear noise in the final application.
KTEPS with Kinematic Transmission Error Prediction Software
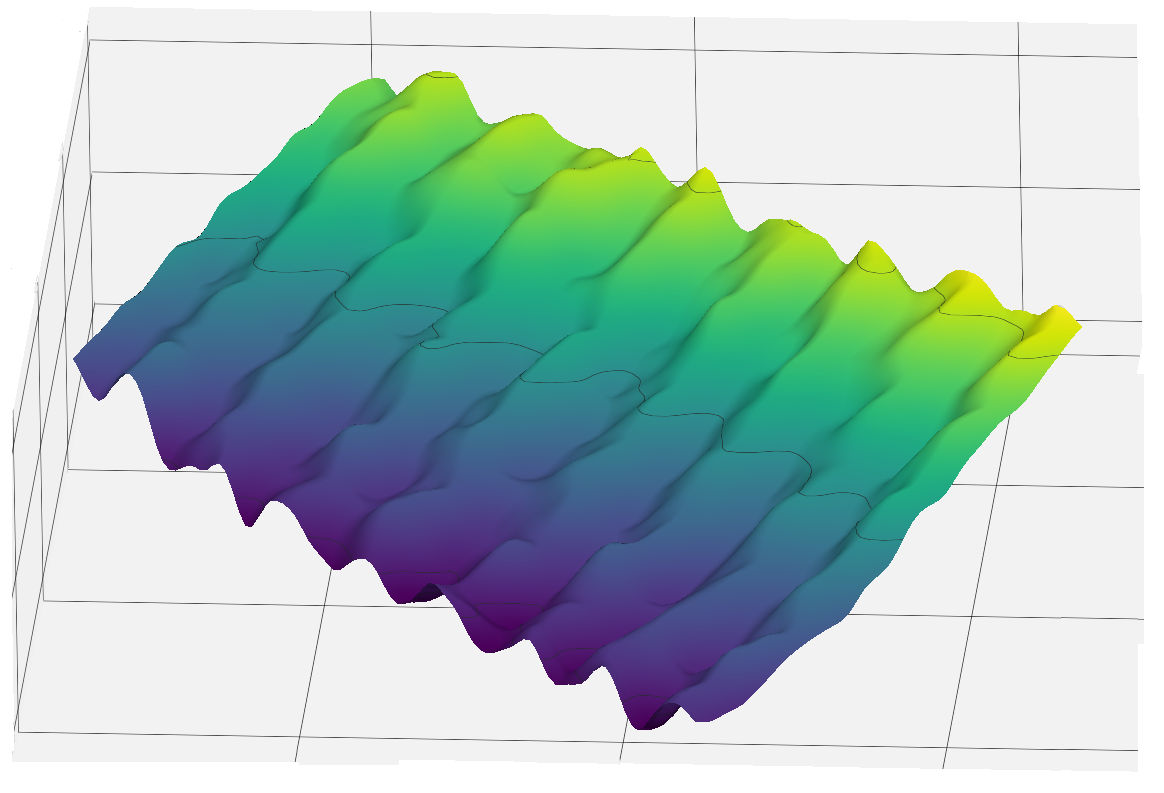
Using topographical data of all teeth to detect tooth flank waviness, KTEPS offers a revolutionary method of showing tooth flank surface deviations in relation to their frequency. In fact, KTEPS is the only software tool, which shows surface deviations and their relation to frequency. By calculating the transmission error of the analytically measured gear topography, KTEPS offers the functionality to extract tooth waviness from the tooth flank, revealing the basis of bad noise behavior in a 3D, easy-to-understand false color chart. Tracing the source of tooth flank waviness to a specific machine, understanding the cause, and being able to adjust/correct the respective process to actually reduce gear noise, makes gear noise analysis truly valuable.
Bringing Nano Accuracy to the Shop Floor
With the 300GMSP nano, the highly successful 300GMSP has also been lifted to new heights of accuracy. The design of the 300GMSP, with its integrated active dampening system, has been retained without increasing the small footprint of the machine. This unique patented design offers extreme vibration dampening even in the roughest manufacturing environment, in close proximity to the respective production machinery. The vibration dampening system, along with temperature compensation for both workpiece and metrology system itself, and its imperviousness to ambient contamination like mist and dust, makes Gleason’s 300GMSP nano the premiere gear metrology system for day-to-day shop floor gear inspection.
(Authors)
Parag Wagaj
General Manager, Sales and Engineering Technology
Gleason Metrology Systems
Klaus Deininger
International Sales Manager
Gleason Metrology Systems
About Gleason
Gleason is a global leader in gear technology. Gleason’s "Total Gear Solutions" range from gear and transmission design software to the development and production of gear manufacturing machines and related accessories, gear metrology equipment and automation systems. Gleason products are used by customers in the automotive, commercial vehicle, aerospace, agricultural, mining, energy, construction, power tool, marine and many other industrial equipment markets. Gleason has manufacturing facilities in the U.S., Brazil, Germany, Switzerland, India, China and Japan, and operates sales and service offices in North and South America, Europe and Asia Pacific. For more information about Gleason Corporation, please visit www.gleason.com.