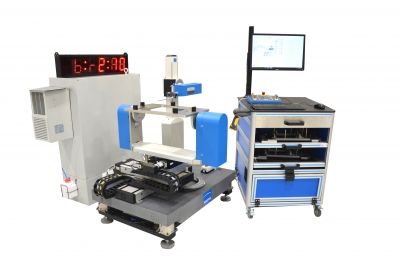
Jenoptik Industrial Metrology Hommel-Etamic Wavemove Measuring Station Features Eight-Axis CNC Measurement Technology
The Jenoptik Industrial Metrology division offers a fully automated measuring station which can be operated directly by staff on the production line. The Hommel-Etamic Wavemove combines high-precision roughness and contour measurement technology with innovative CNC technology and eight fully automatic CNC axes to measure both roughness and contours in a single measuring run, recording as many data points as necessary. The system is well-suited to automotive production.
Wavemove is integrated directly into the production process as an SPC measuring station. The workpiece can be clamped into the measuring system at any stage of production - Wavemove recognizes the workpiece and automatically suggests the predefined measuring points via the operating program.
The Wavemove allows manufacturers to perform twist measurements on sealing surfaces. On camshafts, roughness is typically measured at bearing points, in grooves and on the cam itself. The machine is also capable of performing highly complex measurement tasks on and in cylinder blocks. In this application, roughness measurements are performed in cylinder bores, on sealing surfaces and in the crankshaft bearing channel. In practice, these components have up to 70 defined measuring points which are processed sequentially in a single measuring run.
Once the workpiece is clamped correctly, the operator uses a DMC hand-held scanner to capture the data matrix code. Depending on the stage of production and the workpiece type, the operator selects the appropriate measuring program and starts the measuring run.
The measurement process itself is fully automatic - the measuring probes independently travel to the predefined measuring points on the workpiece, and the movable axes allow the measuring column to be moved upwards and downwards, crossways and lengthways. In addition, the pick-up element for the workpiece is mounted on a 360° turntable and can also be moved in different directions. Similarly, the traverse unit and measuring probe can be tilted, swiveled and rotated. This freedom of movement allows the sleeve to move the roughness probe to any measurement position, even those that are difficult to access.
If required, the contour probe can be operated in parallel with the roughness probe, which provides convenient top and bottom measurement via two probe heads. The high degree of flexibility in axis positioning means that the probes can access almost any point on the workpiece.


