Jenoptik Offers Variety of New Measurement Technologies
At the Control trade fair for quality assurance, Jenoptik offered a variety of automated measuring and inspection stations as well as new sensors and functions of the proven measurement technology for the target groups of automotive manufacturers and suppliers. Here are some highlights:
The Jenoptik Opticline C series is being expanded to include measuring systems for larger and heavier workpieces, a wide range of automation solutions and additional multisensor applications.
The addition of the C923 and C1223 variants means that the proven technology platform of the Opticline C series can now also be used for large and heavy workpieces. This means that customers from market segments such as e-mobility, energy generation, commercial vehicles and aerospace can now also benefit from the highest accuracy and widest range of functionality in optical shaft measurement technology.
With integrated machine monitoring and compensation algorithms for temperatures and ambient conditions, solutions for fully automatic workpiece loading and independent calibration sequences, automation solutions can be individually scaled and long-term stable process reliability can be guaranteed even in harsh environmental conditions.
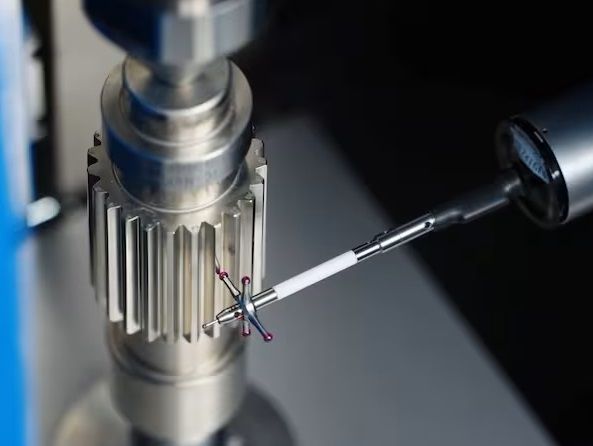
With the optional T3D tactile sensor, the Opticline systems can be expanded into a complete multi-sensor shaft measuring device. This means that all tactile and optical features can be recorded with high precision within a single measuring sequence in just seconds, and cycle times are significantly reduced. With the integrated option for gear measurement, typical gear features for spur and helical gears can now also be measured, which further increases the flexibility of the Opticline measuring system and enables fast process-oriented quality statements. Established functions such as automatic probe arm changes and system checks also increase efficiency directly in the production process.
The advanced Tolaris Optic 6 measurement and evaluation software provides support for programming all the extensive new functions. The highlight of the new software version is a clearer user interface with improved functions, which makes programming and operator self-monitoring even easier and faster in just a few minutes.


