E-Drive Gear Inspection and Noise Analysis
Gleason offers technology that caters to e-Mobility applications while changing the existing manufacturing process chain.
In conventional gear manufacturing, quality control is carried out randomly, with only a few parts actually inspected. This is mainly due to the significantly longer measuring times in comparison to the actual production time and limited overall measuring capacity to cope with increased inspection demands. In order to guarantee process reliability, statistics are instead used to validate the process, resulting in a significant reduction of the manufacturing tolerance in comparison to the drawing tolerance. In addition, constantly increasing power density requirements and the growing importance of excellent noise behavior of transmissions, especially in new e-drive concepts, has resulted in very tight tolerances. Relying on statistical evaluation makes the production of such gears more challenging and expensive.


A new inspection concept developed by Gleason, called GRSL (Gear Rolling System with Integrated Laser Scanning) features a combination of double flank roll testing and laser scanning. With this completely new approach, inspection now can be performed without adding to the time required for the hard finishing operation. As a result, 100 percent in-process inspection of all teeth has become a reality, eliminating the need for statistical process evaluation.
Laser scanning provides comprehensive data volumes beyond standard gear characteristics such as profile, lead, pitch, runout and size. Understanding the profile and lead of all teeth makes it possible to conduct an “Advanced Waviness Analysis” resulting in an order analysis of the gear topography including the corresponding amplitudes. Now, potential noise issues like “ghost orders” can be detected, which are not related to the mesh harmonics of the gear and are typically caused by small irregularities created during the manufacturing process or involved production machinery. Ghost orders can cause problems once they exceed specific amplitudes.
With the advanced waviness analysis and the possibility to inspect up to 100% of gears it is possible to sort out critical parts before they are assembled within the gearbox.
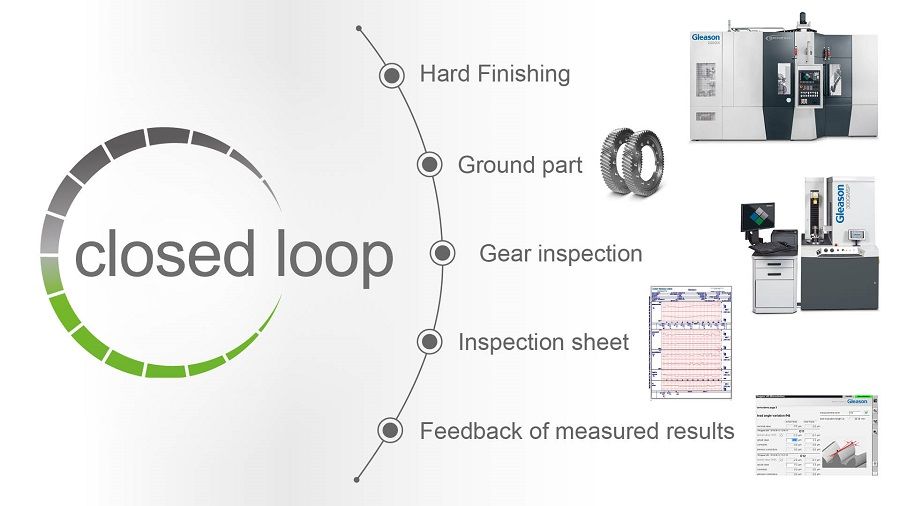
This inspection concept is available as a stand-alone machine with autonomous automation or adapted for simple integration into existing production lines, finally Gleason offers a fully integrated system including the latest threaded wheel grinding machine Genesis 200GX and a fast and flexible automation system, creating the HFC (Hard Finishing Cell) which features an automated Closed Loop correction system to keep gear production within strictest tolerances – at all times. Compared to the conventional measuring process, in-process inspection and Closed Loop correction ensure optimum quality in a fraction of the time. With up to 100 percent quality control, statistical evaluation can be eliminated from the manufacturing process, resulting in stringent compliance with requested tolerances according to original drawings.


